
Porsche
Explore premium Porsche body kits designed to give your vehicle a more aggressive, refined, and performance-inspired appearance. Discover front bumpers, rear bumpers, side skirts, diffusers, spoilers, grilles, and complete exterior styling upgrades for popular Porsche models. Our collection covers sports cars, sedans, SUVs, and GT-style conversions,helping you find the right body kit parts for your Porsche with clearer model-based navigation.
Showing all 14 results

718 911 971 (5)
Cayenne (5)
Macan (3)
Panamera (1)
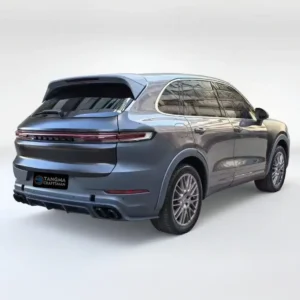
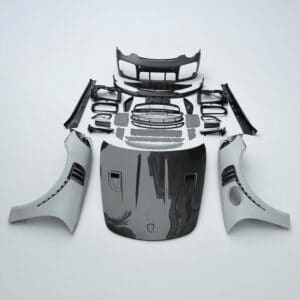
958.2 to 9Y0 Body Kit | Porsche Cayenne Turbo Style 2024
Sale!Original price was: $3,889.00.$3,799.00Current price is: $3,799.00.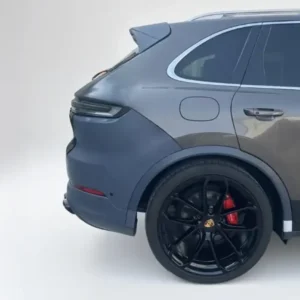
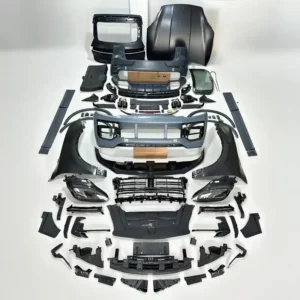
Cayenne old modified new 9Y0.2 Turbo GT front bumper assembly + Turbo GT rear kit (wide body wheel eyebrow) Original Data 3D Scanning Accurate Adaptation
Sale!Original price was: $3,899.00.$3,829.00Current price is: $3,829.00.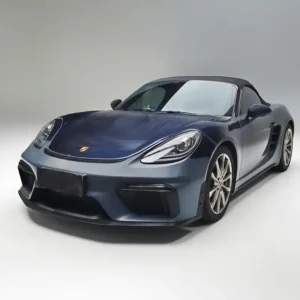
Porsche 718 GT4 body kit Carbon Fiber & Original Fit Wild Upgrade Edition 1:1 Custom Track-Tuned Kit Carbon Fiber Side Skirts + Center Radiator Splitter Factory-Fit + Blacked-Out Details Unleash the 718’s Track Soul
Sale!Original price was: $5,528.00.$5,469.00Current price is: $5,469.00.

Porsche 911 992 modified GT3 RS kit carbon fiber hood adjustable rear wing original factory adaptation 3D scanning modification lightweight
Sale!Original price was: $2,999.00.$2,899.00Current price is: $2,899.00.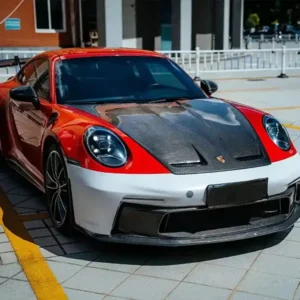
Porsche 911 dry carbon fiber modification GT3 RS kit, carbon fiber hood, adjustable rear wing, factory fit, 3D scan lightweight design.
Sale!Original price was: $4,699.00.$4,599.00Current price is: $4,599.00.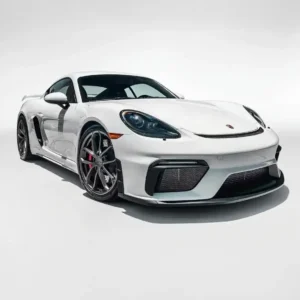
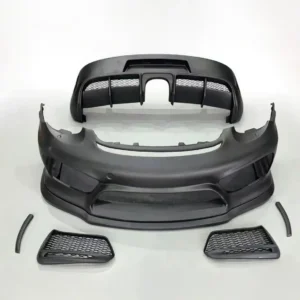
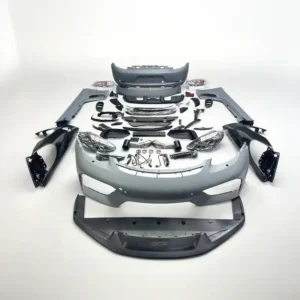
Porsche 987 old model to 718 new model appearance kit
Sale!Original price was: $2,999.00.$2,899.00Current price is: $2,899.00.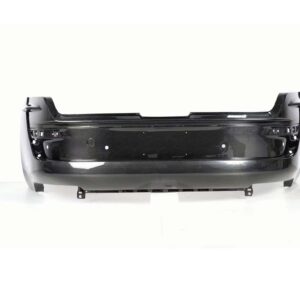
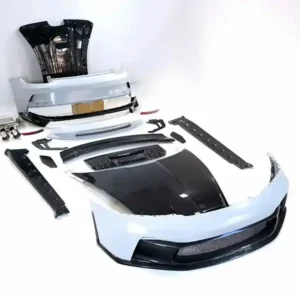
Porsche 991.2 upgrade kit GT3 RS carbon fiber hood + DRS adjustable rear wing | front and rear bumpers + matrix headlights + hood four-piece set | 3D scanning modification + original factory adaptation 2012-2016 models
Sale!Original price was: $2,999.00.$2,899.00Current price is: $2,899.00.
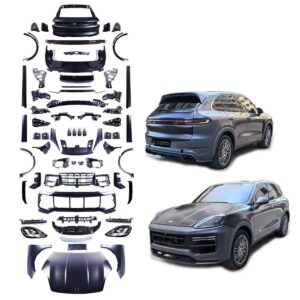
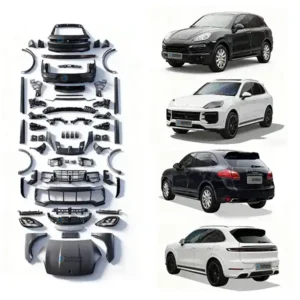
Porsche Cayenne 958 Update Kit Conversion Kit Facelift Retrofit Turbo Style 2024 Style Exterior Pack OEM-Style Upgrade Makeover Kit Full Body Upgrade New Shape
Sale!Original price was: $3,869.00.$3,799.00Current price is: $3,799.00.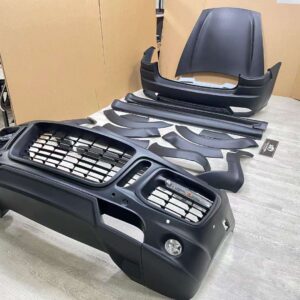

Porsche Cayenne modified 958 to 2024 body kit with 3D Laser-Engineered OEM fitment, Polymer Hybrid flares, and Turbine AirFlow™ design. Direct bolt-on.
Sale!Original price was: $3,869.00.$3,799.00Current price is: $3,799.00.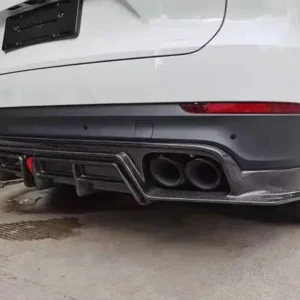
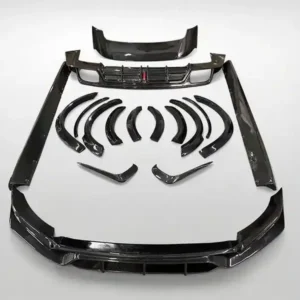
Porsche Cayenne modified carbon fiber kit front lip front wind blade side skirts wheel eyebrows rear lip rear wing roof wing
Sale!Original price was: $1,259.00.$1,169.00Current price is: $1,169.00.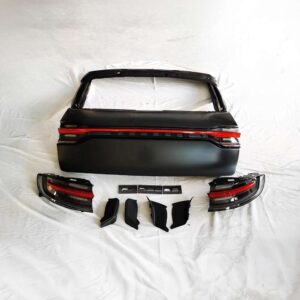
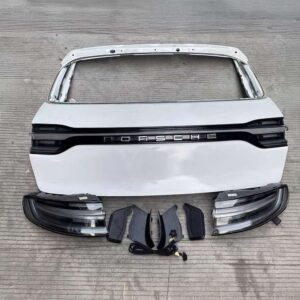
Porsche Macan 2024 Style Taillight Kit & Trunk Lid Upgrade
Sale!Original price was: $1,288.00.$1,196.00Current price is: $1,196.00.

Porsche Macan modification 2023 body kit upgrade for 2012-2022 models, 3D scanning technology for precise fitment and professional aesthetic enhancement.
Sale!Original price was: $2,899.00.$2,799.00Current price is: $2,799.00.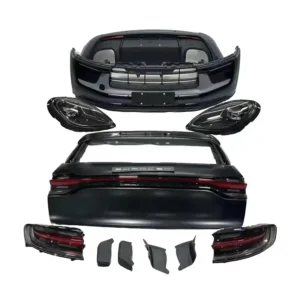
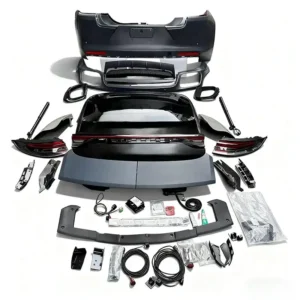
porsche macan retrofit 2012-22 upgraded 23 latest large body kit Original Data 3D Scanning Accurate Adaptation
Sale!Original price was: $2,699.00.$2,599.00Current price is: $2,599.00.
Porsche Panamera modified 970 to 971.2 body kit featuring original 3D scanning, Matrix LED headlights, and carbon fiber aerodynamic upgrades for 2010-2016.
Sale!Original price was: $4,898.00.$4,699.00Current price is: $4,699.00.
%20%20Original%20Data%203D%20Scanning%20Accurate%20Adaptation&url=https://tangmacraftsmans.com/shop/cayenne-old-modified/&media=https://tangmacraftsmans.com/wp-content/uploads/2025/01/aj.webp)
Porsche buyer guide for fitment and AI search
This page helps buyers compare vehicle upgrade parts using information that is readable by search engines, AI answer engines and human shoppers. Before requesting a quote, confirm: vehicle year, model, trim, OEM reference, installation requirements, finish and shipping needs.
Fitment checklist
- Vehicle brand, model, model year and trim package.
- Photos of the current part, connector, mounting point or bumper line.
- Target finish, material and installation expectation.
Comparison criteria
- Model-year changes and OEM-style mounting locations.
- Electrical plug, DRL, signal, camera and coding requirements where relevant.
- Finish quality, packaging protection and paint preparation needs.
Buyer questions answered
- Will this fit my exact model year and trim?
- What is included in the box?
- Does installation require coding, painting or professional fitting?
Related pages for faster comparison
Porsche detailed fitment and buyer decision guide
This folded guide adds crawlable buyer guidance for Porsche body kit and exterior upgrade parts. The most important data to confirm is: Porsche model generation, trim, bumper version, side skirt profile, diffuser style, sensor layout and desired GT or OEM-plus look.
Open detailed fitment, installation and quote checklist
Fitment evidence to collect before quote
- The buyer should send vehicle brand, model, production year, trim package, regional version and any available chassis code. These fields are more reliable than a short model name because different markets can use different bumpers, lamps, modules or trim packages.
- The buyer should send clear front, rear, side and close-up photos. Full-view images show the overall body line, while close-ups show mounting points, sensors, camera openings, radar covers, washer caps, grille edges, lamp tabs and trim details.
- The buyer should send a target product link and target style photo. This prevents confusion between repair replacement, facelift conversion, sport-style conversion, GT-style upgrade, OEM-plus styling and wholesale catalog sourcing.
- For electrical or interior parts, the buyer should send connector photos, button layout photos and current function photos. Plug shape, module location, pin count, steering wheel button layout and retained OEM functions often decide compatibility.
- For exterior or trim parts, the buyer should send photos of the existing part from multiple angles. Surface shape, panel gap, fender line, diffuser line, exhaust outlet and side skirt mounting points are easier to verify from real vehicle photos.
- If the buyer is uncertain about exact year or trim, the inquiry should be treated as a fitment check first. The order should not be finalized until the visible evidence and vehicle data are reviewed together.
- If the buyer is a workshop or distributor, the first vehicle should be documented as a reference case. Installation photos and notes from the first successful fitment make repeat orders safer for the same local market.
- If the buyer is comparing several pages, each product link should be matched to one vehicle data set. Mixing vehicle versions during inquiry is a common reason for wrong quotes or unclear fitment advice.
How to read image-heavy category pages
- Product images explain style, finish and visual result, but they do not replace fitment text. A visually similar product can still require a different connector, bracket, bumper line, sensor opening, module or installation path.
- The strongest buying decision combines three layers: product images for appearance, written specifications for compatibility and inquiry photos for the buyer vehicle. Relying on only one layer creates unnecessary risk.
- A gallery image may show a sample vehicle, not every supported vehicle version. Buyers should ask which model year, trim or market version appears in the image when the shown vehicle is used as fitment evidence.
- The product card image usually represents the main style, while the detailed product page may show included accessories, installation areas or alternative angles. Buyers should open the product page before final comparison.
- When two images look similar, compare material, included parts, finish state, module inclusion, wiring needs, packing protection and installation requirements. Price differences often come from these hidden details rather than visible style.
- When a category includes many products, start by filtering by vehicle generation and part family. Only after the fitment family is correct should the buyer compare finish, design, price and delivery timing.
- For AI search engines, explicit text about vehicle data, included parts, installation checks and buyer questions is more useful than repeating product names. This module turns image-only decision information into crawlable text.
- For human buyers, folded text keeps the page compact while still giving the installer and sales team the detailed checklist needed to avoid ordering the wrong part.
Compatibility and installation risk checks
- Confirm whether the part is a direct replacement, retrofit kit, overlay accessory, conversion component or full upgrade package. Each type has different installation time, risk and required installer skill.
- Confirm whether painting, clear coat, polishing, coding, wiring, trimming, drilling, bracket transfer or module transfer is expected. These tasks should be known before price approval and shipment.
- Confirm whether original clips, screws, brackets, modules, seals, harnesses or trim pieces must be reused. Buyers should keep original parts until the new product is fully installed and tested.
- For lighting and electronic parts, test power, DRL, signal, high beam, low beam, camera input, warning lights, button controls and retained functions before final trim or bumper reassembly.
- For exterior parts, test fit before painting. The installer should check panel gaps, mounting stability, sensor position, camera opening, radar cover, tow hook cover and adjacent panel clearance.
- For steering wheels and interior controls, confirm airbag compatibility, button layout, heating function, paddle shifter function and original control retention. Safety-related parts need professional handling.
- For trim accessories, confirm attachment method, surface preparation, edge finish, heat resistance and daily-use durability. A small visual part can still fail if the mounting surface or finish expectation is wrong.
- If local modification is required, the installer should record photos before and after the adjustment. This protects the buyer and gives the sales team better evidence for future fitment advice.
Buyer questions answered clearly
- Will this fit my exact vehicle year, trim and regional version? The answer depends on matching the buyer vehicle photos and data against product shape, function, connector, module and mounting requirements.
- What is included in the box? The buyer should confirm the main part, left/right pieces, brackets, modules, adapters, screws, clips, trim pieces, carbon accessories and any required installation notes.
- Does this require professional installation? Most lighting, exterior conversion, steering wheel, multimedia and carbon body components should be installed by a professional because fitment, wiring, safety and finish quality matter.
- Can the product be painted or customized? Many exterior parts can be painted or finished locally, but test fitting should happen before paint, and the buyer should confirm whether the shipped surface is primer, raw carbon, gloss black or final finish.
- How should the part be inspected after delivery? Check outer packaging, lens surfaces, carbon finish, mounting tabs, edges, included accessories and visible shipping damage before scheduling installation.
- How should the part be tested after installation? Confirm physical alignment, secure mounting, retained original functions, no dashboard warning, no water leakage, correct lighting behavior and acceptable final appearance.
- What should a workshop send for wholesale support? Send the vehicle market, sample installation photos, customer demand, quantity, desired finish and any local modification notes after the first install.
- What if the buyer is not sure which product to choose? Send the vehicle photos first, then ask for a fitment check before comparing price or finish. Correct fitment should come before style preference.
Shipping, documentation and after-sales records
- Large and fragile auto parts need suitable packing. Buyers can request packing photos for lamps, bumpers, carbon parts and oversized accessories before dispatch.
- The quote should record destination country, full shipping address, quantity, product link, finish choice and any special packing request. Missing shipping data can delay final pricing.
- After delivery, inspect the carton before signing when possible. If the carton is crushed, wet or torn, take photos immediately because logistics evidence is strongest before unpacking.
- After unpacking, compare included parts with the quote and product notes. Small accessories are easiest to verify before paint, coding or installation work begins.
- After installation, keep final installed photos and any installer notes. These records help with warranty review, repeat orders, customer support and future product matching.
- For repeat buyers, keep a simple fitment log by vehicle version and product link. A reliable internal log saves time and makes future AI/search-driven recommendations more accurate.
- For distributors, do not remove fitment notes when reusing product information. The notes are what help end buyers understand whether the product is suitable for their exact vehicle.
- For workshops, photograph any local adjustment. Honest installation evidence improves future recommendations and reduces repeated fitment questions for the same platform.
High-image-count comparison rules
- When a category contains many product images, buyers should compare products in a written shortlist instead of relying on visual memory. Write down the product link, vehicle version, required function, finish and installation concern for each option.
- A high-image category usually contains several generations or trims. Buyers should remove every option that does not match the exact vehicle evidence before comparing appearance, because an attractive style is not useful if the base fitment is wrong.
- For headlight-heavy categories, compare the original lamp type, connector, module requirement, DRL design, signal behavior, beam pattern and market version. These details are more important than lens shape alone.
- For trim-heavy categories, compare attachment method, surface preparation, finish durability, edge shape, wheel or body clearance and whether the part is an overlay or replacement component.
- For body-kit-heavy categories, compare bumper line, grille edge, sensor location, camera opening, fender line, diffuser shape and exhaust outlet before choosing paint or carbon finish.
- The final inquiry should include the shortlisted product links and explain why those options were selected. This gives the fitment team enough context to confirm the safest option rather than starting from a vague style request.
Shortlist steps for dense product grids
- Step one is to remove products outside the confirmed vehicle generation. This single step prevents most wrong comparisons because many automotive parts look similar across generations but use different mounting points or electronics.
- Step two is to remove products that do not match the buyer function. A repair buyer, a styling buyer, a workshop buyer and a distributor may need different answers even when they are viewing the same category page.
- Step three is to compare installation risk. Products that need painting, coding, wiring, bracket transfer, module transfer or local trimming should be marked clearly before the buyer chooses only by appearance.
- Step four is to compare total order readiness. The best option should have clear vehicle match, clear included parts, clear finish expectation, clear shipping plan and enough photos for the installer to review.
- Step five is to ask for a fitment check using the final shortlist. Sending three focused links with vehicle photos is more efficient than sending a broad category page and asking which one is best.
- This process keeps dense category pages useful without forcing buyers to read every product card. It turns a visual catalog into a structured purchase decision that can be understood by buyers, installers and AI search systems.
- If two shortlisted products remain similar after the fitment check, choose the one with clearer included-parts information and lower installation uncertainty. A slightly simpler installation is often better than a more aggressive style with unclear requirements.
- Before payment, the buyer should repeat the final fitment summary in one message: vehicle version, selected product link, expected finish, included parts, destination country and installer notes. This final summary is the cleanest handoff for order confirmation.
- If the buyer is comparing a model-specific headlight or trim page, confirm whether the sample vehicle in the product image matches the buyer market. Regional bumper, lamp and trim differences should be resolved before order approval.
- For Toyota headlight comparisons, facelift year and regional lamp specification should always be checked together.
- Confirm connector photos before final Toyota approval.